Making High Traction Tires for Sumo Robots
by Daryl Sandberg
A couple of years ago I started making high traction tires based on a formula that I received from Robert Sutter. The tires produced by this method have extraordinary traction!
Here's how to make sticky tires.
First you'll need a mold. It doesn't have to be fancy. The easiest way to make a mold is with a hole saw and some plastic or wood. Just make a hole that is the same size as the outside of the tire you want to make. Sand it as smooth as you want the surface of the tire to be. You can also use plastic plumbing pipe and couplers, aerosol can tops, anything that's round and the correct size for the tire you need. Molds can even be made out of modeling clay or wax. You can use the wheel itself as the inside part of your mold.

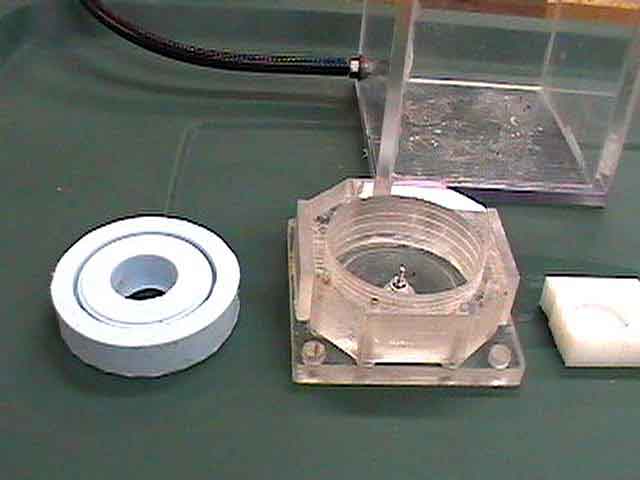
If you make the mold out of wood or other porous material, you have to seal it, otherwise you get bubbles in your tire casting. I used epoxy. If you have a inside edge on your tire, there should be a slight radius to it. A sharp inside corner in the mold can catch bubbles.
Even though the urethane doesn't adhere very well, the mold should be coated with paste wax to help to get the tire out when it's cured.
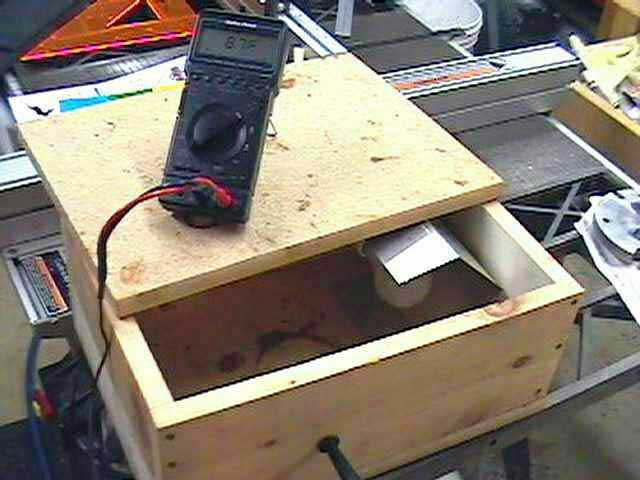
A nice option is a hot box. A hot box will help get bubbles out of the mix by making the urethane more viscous. It also makes the urethane cure more quickly. The box I built is about the size of two shoe boxes put together. I used plywood and some particle board that I had laying around the shop. Mount a high temperature light socket in the box. I made a reflector out of thin sheet aluminum. This is necessary to dissipate the heat and help keep the wood from getting too hot. Screw a 40 watt bulb into the socket. You can use a 60 watt bulb if you monitor the temperature closely, but at this temperature I've found that acrylic molds will stress crack and newly made silicone molds will react with the urethane. The inside of the box should be about 100 degrees F. If you use a well cured silicone mold or a metal mold you can cook the urethane at up to 250 degrees.
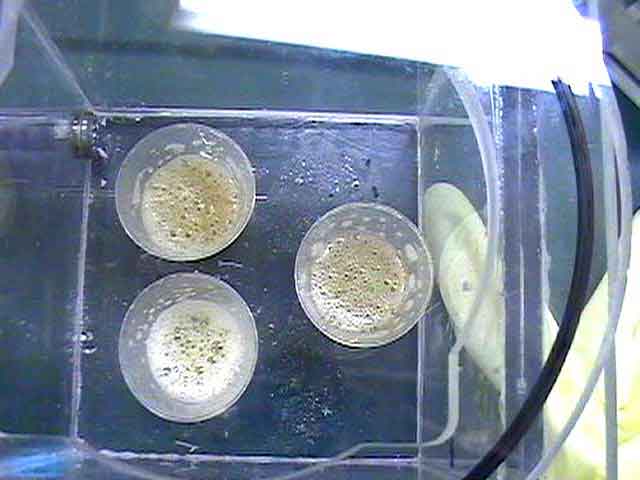
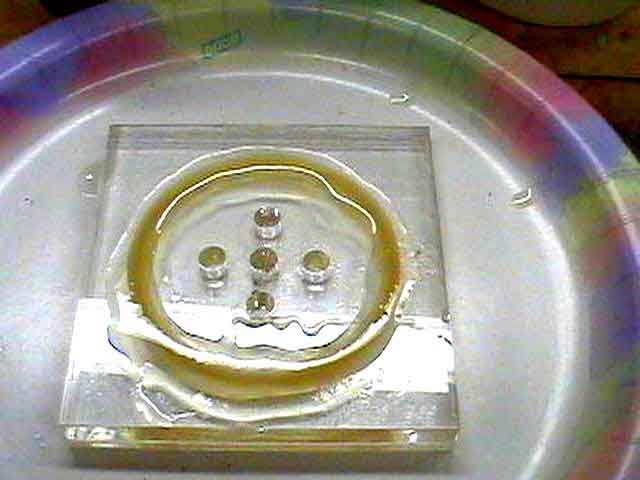
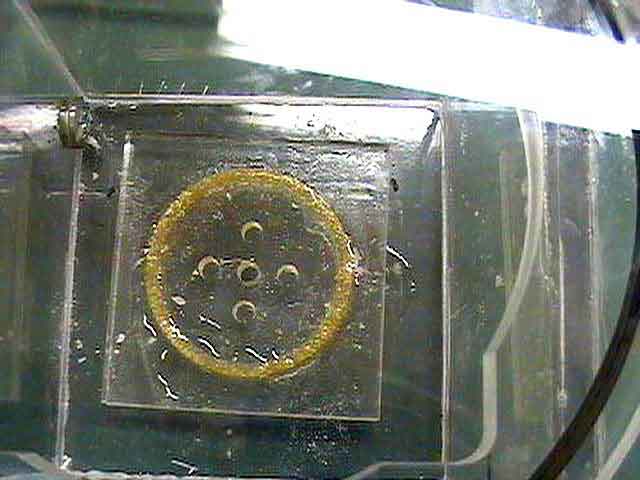
Building a vacuum chamber isn't necessary but it sure makes a difference in the quality of the casting. When the compound is mixed it's inevitable that you will get hundreds of tiny bubbles in the mixture. In a vacuum chamber the bubbles will expand and burst. The hot box will get out some of the bubbles but if you want perfection, use a vacuum chamber. By the way, a household vacuum just won't work. An old refrigerator compressor works very well.
Now for the messy part, mixing the urethane. The compound used for the tires is a urethane RTV compound. It's available from TAP Plastics and Polytek. The Part A and Part B are easy to come by. These two parts of the compound normally are used for making molds. Tap has the Part A and Part B in smaller quantities than Polytek (one pint vs. one quart). The Part C is a softener and is a little tougher to get. TAP doesn't stock Part C. They order it from Polytek. That can take two months so I would suggest ordering this directly from Polytek. The part number is 74-Part C.
The mix is one part A, one part B and one part C. The proportions for Parts A and B are absolutely critical. If the mix is off by more than 3% the urethane just won't cure. This is tough when mixing small quantities. Just a few drops off and all you get is a gooey sticky mess. Part C isn't critical. If you use less than one part, the tire will be harder and have less traction. If you use two parts of C, you will probably have a very soft, very weak tire. I haven't tried it because the 1-1-1 mix will produce a tire that is plenty sticky enough for me.
Here's how I mix the chemicals. First I determine the volume of the mold, then double the amount. It's much better to have too much than not enough. It's also more likely to get the proportions correct with a larger volume. Plus it's nearly impossible to get all the mix into the mold.
I use three small plastic mixing cups, one for each chemical. These are available at any hobby store. First mark the cups with a black fine tipped marker on the fill line because the clear plastic increment lines disappear when the chemicals are in the cup. Line up all the cups side by side and adjust the level with a very critical eye. You could also weigh the chemicals if you have a scale that will read down to tenths of a gram.
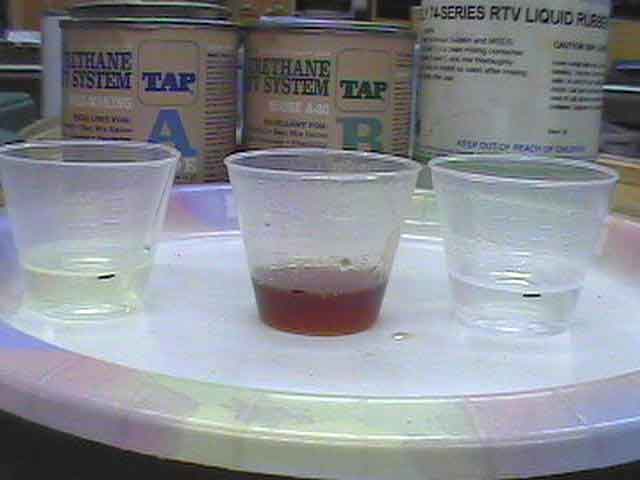
Start with Part A. This stuff is really thick, gooey, and sticky. Trying to pour from the can into the cup is very difficult so I dip a stick into the can and let the runoff from the stick fill the cup. Let this sit for a minute to even out. If the cup is too full you can use the same stick method to pull some out of the cup. Clean the lid and the can with acetone before you put the lid back on or you may never get the lid off again.
Next pour Part B into a cup. This stuff is a little more fluid so it's much easier to work with. Wait for it to level and make certain that it is exactly the same amount as the part A.
Now pour Part C into a third cup. Check all three cups again to make certain that they are at exactly the same level.
Now comes the tricky part. Pour the cup of Part A into the cup of Part B. Mix slowly but thoroughly. Use a round stick or rod as a square or flat stick will introduce bubbles. Now pour the mixture back into the cup originally used for Part A. Mix thoroughly again. Now mix in the Part C. Pour the mixture back into the C cup and back again. This process insures that all of the parts are mixed completely and correctly. If the mix is too much for the small cups you can use a larger paper or plastic cup, but you still must pour some of the mixture back into the original cups, stir, then pour back again to get a perfect mix. You cannot stir it too much. Remember, a couple of drops off and the urethane won't cure.
No matter how carefully you mix, you are going to get bubbles. This can be a problem, depending on the size and shape of the project. As stated earlier, vacuum is the best for getting out the bubbles but also the most expensive and complicated. If you use a vacuum chamber to degas the mixture, only fill the cups to one-third. The mixture will expand about 300%, then collapse. Keep the vacuum on for another minute. If you don't have a vacuum chamber, a hot box works OK. I also use a large 60CC syringe. Draw the urethane out of the cup and tip the syringe so it's pointing straight up. Block the end of the syringe with your fingertip. Draw back on the plunger. A large air pocket fill will form above the mixture. You can watch the bubbles expand and burst. Hold this for about a minute to get out the larger bubbles. The syringe also makes it easier to fill the mold without getting the goo all over the work bench.
Carefully fill the mold. Watch out for horizontal ledges in your mold. These will trap bubbles and ruin your project. Usually tipping the mold and filling slowly will solve the problem. The pour time is up to thirty minutes so there is no need to hurry. If the mold has an open top, slightly overfill the mold. As bubbles come to the surface the level will drop. Don't empty out the syringe. If your mold has a leak or the level drops more than expected you can top it off. Don't worry about the compound curing in the syringe, it won't stick to it.
Place the mold into the hot box. Keep an eye on the project for the first hour or so. The mixture will get thinner from the heat and find leaks that weren't a problem when the urethane was thicker. Refill the mold as needed with the syringe.
It will take at least several hours for the compound the cure enough to remove it from the mold. Best to wait overnight. If you can create fingerprints in the urethane it's not ready to come out yet. Work the tire out of the mold slowly. The urethane is very tough and stretchy and as long as you don't use something sharp to get it out it will take a lot of tugging. If the tire won't hold it's shape then the mix was wrong and you will have to start again. Unfortunately, this is pretty common.
There you have it, your first high traction tire! It's not ready for competition yet as it takes a couple of days to cure thoroughly, so don't put any weight on it. You could end up with a flat spot. But check out that traction!
Related links